Home     About Me     Recipes     Blogs I Read     Contact

Monday, October 31, 2011

Pumpkin Soup (with Bacon & Maple Croutons)


Every year when October rolls around, I get so excited to see all of the bright orange pumpkins on display in the grocery stores.  The sight of pumpkins piled high in the grocery bins causes my mind to immediately drift toward thoughts of pumpkin breads, muffins, pies, and any other type of common pumpkin-flavored treat.  However, although baking with pumpkin is something very familiar to me, I am quite a novice when it comes to using pumpkin in savory types of dishes. 

Ellie, of Gourmand Recipes, has caused me to rethink my use of pumpkin, and has inspired me to try something new.  She recently posted a recipe for Pumpkin Soup, which includes bacon and maple croutons.  Bacon and maple--you can never go wrong with this flavor combination!  As if these additions weren't convincing enough, she is known for including beautiful food photos in each of her recipe posts, and this pumpkin soup recipe is no exception.  Her food photography is really something extraordinary.  Not only do her photos make the food look delicious, but they always seem so bright and comforting.  I can only hope that my photos can someday come close to her level, but for now, I do what I can with my handy digital point-and-shoot camera.  I really recommend going to her website to find some other great recipes and see the amazing photos.

When I first saw this recipe, I couldn't help but be interested in the idea of using fresh pumpkins to make soup.  I've never made pumpkin soup before, but the recipe sounded easy enough.  The bacon and homemade maple croutons sounded like their flavors would meld perfectly with the comforting flavor of the pumpkin. 

I used one 4-lb fresh sugar pie pumpkin from Trader Joe's to make this soup.  Since it was my first time, I did a little research to learn how to prepare this sugar pie pumpkin.  I found a great tutorial here.  Despite the requirement of removing the seeds, peeling the skin, and cutting into cubes, it was well worth the effort!  It resulted in an amazing, comforting soup that was the perfect dish to welcome fall.  If you're in the mood for something that is hearty and satisfying, head over to Gourmand Recipes for this great recipe!


Pumpkin Soup (with Bacon & Maple Croutons)
Recipe from Gourmand Recipes
Yield:  Serves 6

Get this recipe here!


Sunday, October 30, 2011

Gourmet Roasted Pumpkin Seeds


I love Halloween.  Not just because of the costumes and parties, but because of all the nostalgic activities there are to do that remind me of being a kid.  Pumpkin carving, roasting seeds, and watching Halloween movies on TV (like Hocus Pocus and Addams Family) are all Halloween traditions that bring back memories, and I still enjoy to this day.  

This past week, I went to Trader Joe's and bought two medium-sized pumpkins for Tony and I to carve.  Despite our busy schedules, we finally got the chance to sit down and carve our pumpkins last night, while watching the USC vs Stanford college football game.  It's been a few years since I've carved a pumpkin, but it was a lot of fun, and a nice change from our usual Saturday night activities.  I think even Tony, the self-proclaimed "non-artistic" one, enjoyed carving his pumpkin.  His came out very good, and very scary looking!

Tony's pumpkin

My pumpkin
Although pumpkin carving is fun, I think I was more excited to get the seeds out of the pumpkins than to actually carve them!  I love homemade roasted pumpkin seeds; they have a toasty flavor that you can't get from store-bought roasted pumpkin seeds.  Also, I had recently found recipes for some unique flavors on one of my favorite blogs, Dollhouse Bake Shoppe, so I was very anxious to try them out.  Lindsay, from Dollhouse Bake Shoppe, always has a lot of creative baking ideas so please check out her blog when you have the time.  I think you may find a lot of other great ideas there!


After cleaning and drying the seeds, I ended up making four different flavors:  Parmesan-Garlic, Flamin' Hot, Pumpkin Pie Spiced, and Butter & Salt.  Tony and I both thought that they were all pretty amazing, although with my sweet-tooth, I automatically favor the sugary pumpkin pie spiced seeds.  If you are planning to carve pumpkins tonight or if you already did and saved your seeds, try these recipes from Dollhouse Bake Shoppe! They provide a great variety of flavors, and are definitely delicious and addicting!

Gourmet Roasted Pumpkin Seeds

Recipe from Dollhouse Bake Shoppe

Ingredients:
Pumpkin seeds from a medium-sized pumpkin (about 1 1/2 cups)
1 Tbsp unsalted butter, melted
*Seasoning blend of your choice:

*SWEET - Pumpkin Pie Spiced
3 Tbsp sugar
1/2 tsp cinnamon
1/4 tsp nutmeg
1/8 tsp allspice
*SALTY - Parmesan Garlic
1/3 cup grated Parmesan cheese
1/2 tsp garlic powder
1/4 tsp salt
1/4 tsp pepper
*SPICY - Flamin' Hot
1 tsp chili powder
1/4 tsp hot sauce
1/2 tsp salt
1/4 tsp cumin
1/4 tsp cayenne pepper
*TRADITIONAL - Butter & Salt
1/4-1/2 tsp salt, depending on your taste

Directions:
Preheat oven to 300 degrees F.  Prepare a sheet pan by lining with parchment paper or foil.  Set aside.
Toss seeds with butter and seasonings, to taste.  Pour the seeds into the prepared pan and spread out in a single layer.  Bake for about 30-45 minutes, stirring every 15 minutes, until golden brown.  Remove from oven and cool before eating.  Store in an airtight container.

Notes:
I used seeds from 2 medium-sized carving pumpkins plus one sugar pie pumpkin, and split each recipe in half to make all four flavor variations.  


Monday, October 24, 2011

Caramel Apple Cider Cookies


Fall baking for me can be a little tough...

Why?

Because my boyfriend, Tony, isn't a huge fan of pumpkin.  (He's crazy, I tell you.)  But let me add that he is not a picky eater at all, although this may seem to be the case.  Thank goodness, he is pretty open to any strange food I put in front of him...just as long as it's not pumpkin.

Or blueberries.

Or mustard.  DEFINITELY not mustard... 

So, even though I do buy pumpkin and make a variety of pumpkin baked goods every year when October rolls around, I've had to make an effort to also find fall recipes that use other fall ingredients.  Over the past month, I've been sifting through the endless posts on Pinterest, and organizing a collection of Fall recipes.  Among the many I've collected, one recipe that stuck out in particular was the one for Caramel Apple Cider Cookies.


This cookie recipe was from the website, Gimme Some Oven, one of my favorite food blogs.  When I first saw the picture on Ali's blog, I couldn't help but immediately crave a bite of one of these.  The gooey caramel in the middle of the cookie looked so amazing, and I love the flavor combination of apples and caramel. 

These cookies are really easy to make!  The recipe is pretty straight-forward.  The only unusual ingredients you will need to buy is a box of Alpine spiced apple cider drink mix and some chewy caramel candies.  Ali used Kraft caramels.  I couldn't find these at the store, so I used Werther's chewy caramels, cut into halves, instead.  The rest of the ingredients are pretty common items that you should already have in your kitchen. 

I encourage you to try these cookies.  These definitely gave me the feeling of fall and made the house smell so good!  If you have someone like Tony in your life who doesn't like pumpkin, or is tired of the same old pumpkin pie, pumpkin muffins, etc., then this is definitely a cookie recipe that you must try!


Caramel Apple Cider Cookies

Recipe adapted from Gimme Some Oven, slightly adapted from The Cooking Photographer via Scrambled Henfruit.
Yield:  Approximately 4 dozen, depending on the size of your dough

Ingredients:
1 cup unsalted butter, softened
1 cup granulated sugar
1/2 tsp salt
1 (7.4 oz) box Alpine Spiced Apple Cider Instant Original Drink Mix (not sugar free)
2 eggs
1 tsp vanilla extract
3 cups all purpose flour
1 tsp baking soda
1/2 tsp baking powder
1 tsp cinnamon
1 (5.5 oz) bag Werther's Original Chewy Caramels, cut into halves

Directions:
Preheat oven to 350 degrees F.  Line cookie sheets with parchment paper or a silpat (to prevent melted caramel from sticking to pan).
In a small bowl, whisk together flour, baking soda, baking powder, and cinnamon, and set aside.  In a medium sized bowl (or bowl of an electric mixer), cream together butter, sugar, salt, and all 10 packages of apple cider drink mix, until light and fluffy.  Beat in eggs, one at a time, until combined.  Add vanilla and mix well.  Gradually add flour mixture to wet ingredients, and mix just until combined. 
Scoop out cookie dough ball about the size of a walnut (about 2 Tbsp).  Flatten the ball of dough in the palm of your hand. Place a caramel candy in the center of the dough and seal the dough around it, covering it completely.  Reshape the dough into a ball and place on prepared cookie sheets, about 3 inches apart. 
Bake for 12-14 minutes, or until very lightly browned on the edges.  Remove from oven and carefully slide the parchment paper off of the cookie sheet and onto the counter.  Let cookies cool for a couple minutes on the parchment paper, then carefully twist off the parchment paper and allow to finish cooling upside down. 


Saturday, October 22, 2011

Hummingbird Cupcakes


When I first saw this cupcake recipe on Annie's Eats, I had no idea what kind of cupcake to expect.  The name, "Hummingbird Cupcake," was very unfamiliar to me.  However, after reading through the ingredients list, I discovered that it sounded like something I would definitely enjoy!  Plus, I've tried many cupcake recipes from Annie's Eats, and none have ever disappointed me, so I knew that this recipe would be no exception.

This cupcake consists of a blend of banana, pineapple, shredded coconut, and chopped walnuts, giving it a fruity, slightly tropical flavor.  The addition of cream cheese frosting blends perfectly with these flavors, resulting in a sweet, delightful cupcake!

I made these cupcakes to bring to work (in honor of my supervisor's belated birthday) to share with co-workers, so I decided to make half of the batch with walnuts, and half without.  I also experimented with the topping, garnishing some with toasted shredded coconut, and some with toasted chopped walnuts.  Out of the two, I preferred the "with-nuts" version, but they taste great either way!

Although my method was simpler and quicker, I really like the idea Annie used to decorate her cupcakes.  She actually used fresh pineapple to make beautiful dried pineapple flowers (see her photos and the "how-to" here).  When I make these again (and I will!) I would like to try making the flowers.  They really add an elegant touch to the appearance of the cupcake, and make them look so fancy!


Hummingbird Cupcakes

Recipe from Annie's Eats
Yield:  about 24 cupcakes

Ingredients:
For the cupcakes
2 cups all purpose flour
1/2 tsp baking soda
3/4 tsp salt
1/2 tsp ground cinnamon
11 Tbsp unsalted butter, melted and cooled
1 1/4 tsp vanilla extract
1 1/3 cups sugar
2 large eggs
1 1/3 cups mashed ripe bananas
2/3 cup crushed pineapple, drained
2/3 cup chopped walnuts, toasted
2/3 cup unsweetened shredded coconut (I used sweetened, but reduced the sugar to a little over 1 cup)

For the frosting:
8 oz cream cheese
5 Tbsp unsalted butter, at room temperature
2 tsp vanilla extract
2 1/2 cups confectioner's sugar, sifted

Directions:
For the cupcakes:
Preheat the oven to 350 degrees.  Prepare cupcake pan with paper liners.  In a medium-sized bowl, combine the flour, baking soda, salt, and cinnamon.  Whisk together and set aside.  In the bowl of an electric mixer, beat together the butter, vanilla, and sugar, until well blended and smooth.  Add the eggs, one at a time, mixing well after each addition.  Add the mashed bananas and mix until combined.  With the mixer on low speed, gradually add in the dry ingredients just until incorporated.  Gently fold in the pineapple, nuts (optional), and coconut with a spatula until evenly mixed. 

Divide the batter into cupcake liners, filling each about 3/4 full.  Bake for 20-22 minutes, or until a toothpick inserted in the center comes out clean.  Let cool in the pan for about 5 minutes, then transfer to a wire rack to cool completely.

For the frosting:
Combine the cream cheese and butter in a bowl of an electric mixer.  Beat on medium-high speed until well combined and smooth (about 2-3 minutes).  Add the vanilla extract and mix until combined.  With the mixer on low speed, gradually add the confectioner's sugar until incorporated.  Increase the speed and beat until smooth.  Frost cooled cupcakes, and decorate as desired.  

*Depending on how much frosting you use, you may need to increase the recipe.  If you decide to pipe on your frosting like I did, I recommend increasing the frosting recipe by 50%.  


Tuesday, October 18, 2011

Sweetheart Cookies


Sweetheart cookies are made on a regular basis in my house, so pretty much anyone who knows me well has tasted these cookies at least once.  This is my go-to recipe for parties, unexpected visitors, or just because.  Not only are they delicious and pretty to look at, but they are so simple and easy to make!  They require only a few ingredients which I almost always have on hand, so they can be made at a moments notice.

I first made these cookies years ago, after purchasing the 2003 Taste of Home Christmas Cookies recipe booklet that I found while waiting in line at the grocery store.  Who knew that in that booklet was this gem of a recipe (along with many other great ones)!  The $4.00 spent on that recipe booklet was the best $4.00 I've ever spent!  I've made this recipe too many times to count.  In fact, so many times that I have the recipe memorized.


These sweet, buttery cookies have the perfect texture.  They are light and crispy, and contain a well of tart raspberry jam.  I'm excited to share these cookies with you all, because they are the most requested cookie recipe I own, and did I mention, these are SO SIMPLE!

I made these cookies this weekend, after learning that we would be having some friends over to visit.  Since these friends were from out of town, I wanted to make something special to serve to them upon their arrival.  I immediately knew these sweetheart cookies would be perfect.  In less than one hour, I had these cookies baked, dishes washed, and ready to serve!  Our friends loved them, and of course, the cookies were finished by the end of the night!
Try these cookies!  It's a quick, simple recipe, and a great addition to your recipe collection.  I guarantee they will become a favorite in your home too!


Sweetheart Cookies

Yield:  about 2 dozen cookies
Recipe from Taste of Home's Christmas Cookies (2003 edition)

Due to copyright policies, I am unable to re-post the recipe directly on this blog, but please follow the "Get this recipe" link above to access the Sweetheart Cookie recipe from the Taste of Home website.

Notes:
  • I always use Knott's seedless raspberry jam, for best results.

Sunday, October 16, 2011

Chocolate Bacon Brownies


From a glance, they just look like your average chocolate brownie...but trust me, they're not.  In fact, they are probably one of the most surprisingly delicious brownies I have ever tried!  The lackluster appearance of the brownies actually adds to the shock value, because it includes an unexpected combination of ingredients.  The most important ingredient of any brownie, of course, is chocolate.


Melted semi-sweet baking chocolate and butter--with these two things, you can't go wrong!
But what really takes these brownies to the top is the most surprising ingredient of all...


Bacon.

If you take a bite of these unusual brownies, you can expect to taste chocolate, which you do at first...but then, you'll begin to taste something meaty and flavorful.  The salty, smoky flavor of the bacon is the perfect contrast to the sweetness of the chocolate brownie.  It's subtle enough to not overwhelm the recipe, yet it provides another layer of flavor that will delight your taste buds in a extraordinary way.

You may have seen chocolate-covered bacon at your local county or state fair.  However, if you've tried it before and didn't like it, don't give up on this recipe yet!  I didn't like chocolate-covered bacon either, but decided to give these a try and I'm so glad I did.  The bacon in this recipe is precooked and chopped, then mixed in the batter.  This eliminates the strange textural issue I had with the chocolate-covered bacon from the fair.


I suppose if you're really brave, you can even cook some extra bacon and sprinkle the chopped bacon on the top of the batter before baking.  Another idea I had was making a caramel-bacon sauce to drizzle on the top of the baked brownies.  Either make your own caramel sauce, or use the store-bought kind, and simply infuse it with bacon flavor by mixing in the leftover bacon grease.

I know that the combination of bacon and chocolate may be strange, but at least give it a try!  It just might surprise you as much as it surprised me!


Chocolate Bacon Brownies
Print this recipe


Recipe adapted from the Ghirardelli Classic Brownie recipe, located on their baking bar label
Yield:  16 squares (one 8"x8" pan)

Ingredients:
4 oz Ghirardelli semi-sweet chocolate baking bar (1 bar)
1/2 cup (1 stick) unsalted butter, cut into pieces
1 cup brown sugar, packed
1 tsp vanilla
2 large eggs
3/4 cup & 2 Tbsp all purpose flour
1/4 tsp baking powder
3 strips of bacon, cooked and chopped
Reserved bacon grease

Directions:
Preheat oven to 350 F degrees.  Butter and flour an 8" x 8" pan.  In a heavy 1 1/2 qt. saucepan, melt chocolate bar and butter over low heat, stirring until smooth.  Remove pan from heat; cool to room temperature.  Stir in brown sugar and vanilla.  Add eggs, mix well.  In bowl, sift together flour, baking powder and salt.  Slowly fold in flour mixture; mix well.  Stir in bacon pieces and 2-3 Tbsp of bacon grease.  Pour batter in pan.  Bake for 25-30 minutes, or until a toothpick comes out clean.

Friday, October 14, 2011

Candied Apple Cupcakes


I found this recipe soon after deciding on a carnival theme for my company's Bake-Off.  I had searched the web using every carnival food name that I could think of, and finally came across these wonderful candied apple cupcakes.  I had no doubt that I would be making these.  The recipe sounded so fun and creative, and would fit in perfectly with the theme! 


When mixing the batter, it may seem a little thick at first, but once the apples are added the juice from the apples helps to lighten it up.  At first I was a little surprised by the amount of apples used in the cupcake batter.  Four cups!  It seems like a lot, but now I realize that it's really necessary to give the cake a strong enough apple flavor to be noticeable among the sweet candy coating. 


We filled the mini cupcake liners pretty full, so that we could have a large top suitable for dipping.  Initially, I was afraid that they would spill over as they baked, but this level actually worked out perfectly.


Once baked, it was very difficult to continue the recipe without eating all of them!  The cupcake batter resulted in a very moist, apple-y cake with just a slight aroma of cinnamon. 


The next step in our process was to prepare the candy coating for dipping.  If you have a candy thermometer, it is really quite simple.  Sugar, water, corn syrup, and red food coloring were first brought to a boil.  Then we reduced to a simmer for 20 minutes, and then brought back up to 310 degrees (the cracking stage). 


Finally, the cupcakes were ready to dip!  Using tongs, the cupcakes were dipped upside-down into the candy coating.  Before the candy was able to set, a lollipop stick was inserted into the top of the cupcake, and then arranged in a foil-lined pan to completley harden.  It was really helpful to have another person assisting to insert the lollipop sticks after dipping.  I suggest finding a helper if you decide to insert lollipop sticks--the sticks aren't necessary, but they give the cupcake a more recognizable candied apple look.


It took a few dipped cupcakes before getting the hang of it.  We had to make some adjustments like adding more food coloring, and changing our dipping technique, but soon we figured out the best way to dip and ended up with pretty, smooth candy-coated tops.  The idea of making the candy coating was a little intimidating at first, but it ended up being a great success!  The cupcakes turned out amazing, and were definitely an eye-catcher at the Bake Off!


Candied Apple Cupcakes

Recipe from HonestFare.com
Yield:  about 44 mini cupcakes

Ingredients:
For the cupcakes:
1/2 cup unsalted, room temp butter (1 stick)
1 1/4 cup sugar
2 eggs
1 tsp vanilla
2 1/4 cups all purpose flour
2 tsp baking soda
2 tsp cinnamon
1 tsp salt
4 cups golden delicious apples (diced small or julienne)

For the candy coating:
2 cups sugar
3/4 cup water
1/2 cup light corn syrup
red food coloring

Directions:
The cupcakes:
Preheat oven at 350 degrees and prepare mini cupcake pans with liners.
Cream softened, room temperature butter and sugar together in a bowl using a mixer or whisk until well combined and creamy.  Add eggs and vanilla and mix again until evenly incorporated.
In another bowl, mix all dry ingredients together using a fork or whisk.  Gradually add dry ingredients to the wet mixture, and mix together well until combined.  Fold in the apples.
Divide the batter among lined cups and fill at least 3/4 full, so you get a nice round top to dip into the candy.  Bake the cupcakes for 10 minutes or until spongy to the touch.

The candy topping:
Bring water, sugar, and corn syrup to a boil in a small pot.  Add food coloring and reduce heat to a simmer.  After 20 minutes, bring the mixture to 310 degrees (the cracking stage).  Once it reaches this stage, immediately remove from heat and prepare to dip.
Dip each cupcake, one at a time, using tongs and holding the cupcake upside-down in the candy just long enough to coat the top.  Slowly rotate each cupcake right side up after dipping.  Insert a lollipop stick before the candy hardens, and set to dry.

Tuesday, October 11, 2011

Cotton Candy Cream Cookies


Who doesn't love the fluffy pink clouds of spun sugar on a stick?  Not me.  I personally LOVE cotton candy.  Maybe because it's a nostalgic reminder of spending summer days at the county fair, or maybe because it reminds me of my other favorite carnival treats, such as funnel cakes, candied apples, popcorn, and sno-cones.  Or maybe it's just because I have a horrible sweet-tooth, and always feel a compelling need to eat anything sugar based.  Whatever the reason may be, I chose to make this recipe not only because I like cotton candy, but also because I participated in a "Bake-Off" at my work, and it fit in perfectly with my team's carnival theme!

Before I share the recipe with you, I'd like to share a few photos and details of the "Bake-Off" and how it all came together.  The four members of my team and I got started on our baking early Sunday morning.  We all met at a team member's house, and spent the majority of the day making several carnival-themed recipes (the others will be shared throughout the week).  


Team member, Wes, and his wife, Connie, assembling the cookies.


We made a lot of cookies!


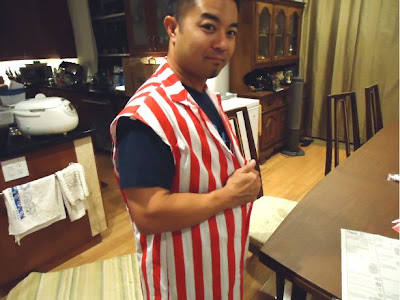
Along with the baking, we also had to work on decorations and displays for our table, and costumes that also matched our theme!  


Team member, Garett, hard at work, sewing.

Team member, Corey, trying on his costume.


Team member, Dale, cutting out the fabric patterns.


After a long day of baking and sewing, we were finally ready for the Bake-Off!  Although it was our company's first ever Bake-Off, I was surprised by the huge number of teams that participated in the event.  For just $2, employees could come to each team's table to taste all the sweet treats, and they also received a ballot to vote for their favorite team in each category:  best cake/cupcake, best cookie, best bar/brownie, and best theme.  


The guys, ready to give away our cookies.

Wes showing off our cotton candy.

There were even games and prizes at our Bake-Off!

Although it was a lot of hard work, it was definitely worth the effort.  We didn't win anything, but it was still a lot of fun working on this creative project with the other team members.  Best of all, our choice of a carnival theme allowed me to get out of my comfort zone and try some very unusual, creative recipes.  I hope there is another Bake-Off next year!


Cotton Candy Cream Cookies

Recipe adapted from The Misfit Baker and bakedbree.com
Yield:  approximately 30 cookies

Ingredients:
For the cookies:
3/4 cup shortening
1 Tbsp margarine
3/4 cup granulated sugar
1/2 tsp vanilla extract
1/2 tsp cotton candy extract
3 Tbsp yogurt
4 tsp milk
1 1/2 cup all purpose flour
1 1/2 tsp baking powder
1/4 tsp salt
Red food coloring (optional)

For the frosting:
1 cup butter, softened
1 (7-oz) jar marshmallow creme
2 cups confectioners sugar
1 tsp cotton candy extract
Blue food coloring (optional)

Directions:
For the cookies:
Preheat oven to 375 degrees F.  Cream together shortening, margarine, and sugar.  Add extracts and yogurt, and beat well.  Mix in milk.  Stir together the flour, baking powder, and salt.  Blend into creamed mixture.  If desired, add red food coloring to tint the dough pink.  Scoop a level teaspoon of dough, roll into a ball, and place on a prepared cookie sheet.  Flatten ball to 1/2 inch thick.  Repeat, placing balls 2 inches apart.  Bake for 8-10 minutes.  Remove from oven and carefully transfer to a cooling rack.  

For the frosting:
Cream the butter until light and fluffy.  Add the marshmallow creme and whip for 2 minutes.  Add the confectioners sugar and continue to beat for 2 minutes.  Add the cotton candy extract and food coloring (if desired). 

Assembly:
Once the cookies are completely cool, pipe or spread frosting on the flat side of a cookie, then lightly sandwich with a second cookie on top.